 |
Modular Turret C++ Plugin
Version 3
Turret C++ Unreal engine 4 plugin
|
 |
Modular Turret C++ Plugin
Version 3
Turret C++ Unreal engine 4 plugin
|

Hi! I'm Final Rockstar I want to thank you for buying this plugin for Unreal Engine 4 I had so much fun while making this plugin I sincerely hope you get the desired result you want to. This is my first unreal Engine project so I apologize in advance if you find something is not working fine or the quality of the plugin is not up to the mark I will try my best to help you. You may try to connect on my Discord channel for any issues, feedback, or suggestions or you can even mail me on gmail . For video preview and setup related thing you can visit my Youtube Channel. It's a learning experience for me. I want to thanks Ben Tristem, Tom Looman for there unreal engine 4 courses which helped me a lot, Epic, and its awesome community.
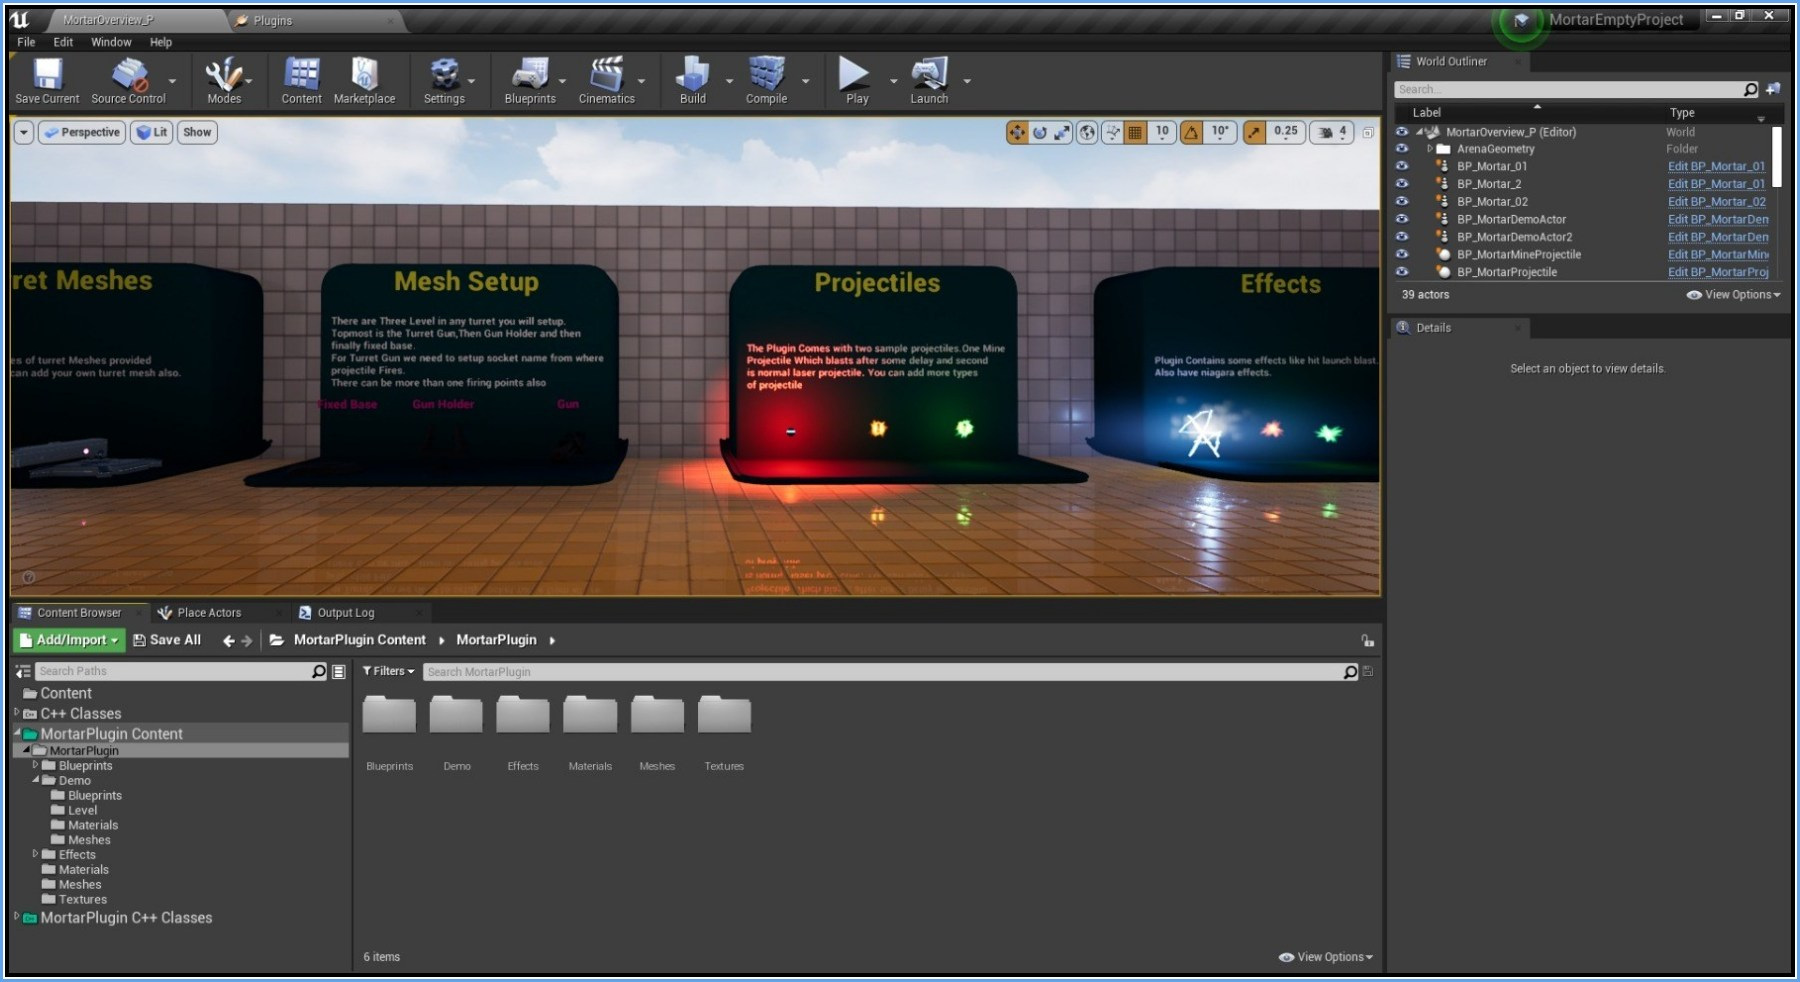
Version 3 has been released on marketplace with more bug fixes,more features and also have a resource manager to save performance.Plugin Contains Demo Folder with an overview Map MortarOverview_P.

The plugin is about creating a Mortar Gun with basic functionalities as quickly as possible. This plugin is developed using C++ and the usage of the blueprint has been very limited. Certain Components are made generic so that they can be used with other Actors. The plugin contains 12 classes and few blueprints which are documented as much as possible so users will easily know what all things are going on. Each source file and blueprint have been prefixed with Mortar keyword to avoid name collision. Following are the files included
| Header File | Description |
|---|---|
| Mortar | This is Main Class of the Mortar Plugin which will be spawned at a game level. Derives from the Actor Class which will contain all the other components. |
| MortarAIController | This is the mind of AI which will be responsible for detecting other actors and setting up keys for the blackboard. This Derives from AIController |
| MortarBarrel | This is a StaticMeshComponent which is the topmost part of the Mortar From where the Projectile will fire. This will allow only Vertical movement |
| MortarTurret | This is also a StaticMeshComponent This is the Middle Part of the Mortar on which the Barrel will be attached. This allows movement in the horizontal direction only |
| MortarTeamComponent | This is an ActorComponent which is responsible for assigning a team to any actor. |
| MortarAimingComponent | This is an ActorComponent which is responsible for aiming the barrel to the desired location and other fire-related things |
| MortarProjectile | This is an Actor Class that is spawned by Mortar's Aiming Component for firing. Includes functionality for projectile launching damaging etc. |
| MortarMineProjectile | This Class inherits from Mortar Projectile Class which allows using Mine Projectile with delay explosion |
| MortarHealthComponent | This is a generic ActorComponent Class for health-related functionalities |
| MortarAIBaseTaskNode | This is the base class for Behavior Tree Task Node Which inherits from UBTTaskNode. All Behavior Tree tasks should inherit from this class. This class checks some conditions and selects the best enemy among the detected actors. This best enemy then can be used by other tasks as the main Target. |
| MortarShootingTask | This is the Behavior Tree Task node for Shooting an enemy which inherits from MortarAIBaseTaskNode |
| ActorsObject | It is simply a UObject which stores TArray of Actors |
| MortarResourceManager | It is a new class which is responisble for restricting the total number of projectiles that can be spawned |
| Blueprint Name | Description |
|---|---|
| BP_Mortar_01,BP_Mortar_02 | Blueprint deriving from Mortar C++ Class This is the blueprint that will be placed in the world. User have to setup StaticMeshs before using finally in level |
| BP_MortarProjectile,BP_MortarMineProjectile | Blueprint deriving from MortarProjectile C++ Class This will be the class spawned by BP_Mortar on firing |
| W_MortarHealthBar | Health Bar widget is shown on Mortar |
| BB_MortarAIBlackboard | Blackboard Key Values used in behavior tree |
| BP_MortarAIController | Blueprint deriving from MortarAIController C++ Class.Things like AIperception, blackboard asset, behavior tree asset has to be set up in it |
| BT_MortarAIBehaviorTree | Simple Behavior Tree Containing Behavior of each mortar |
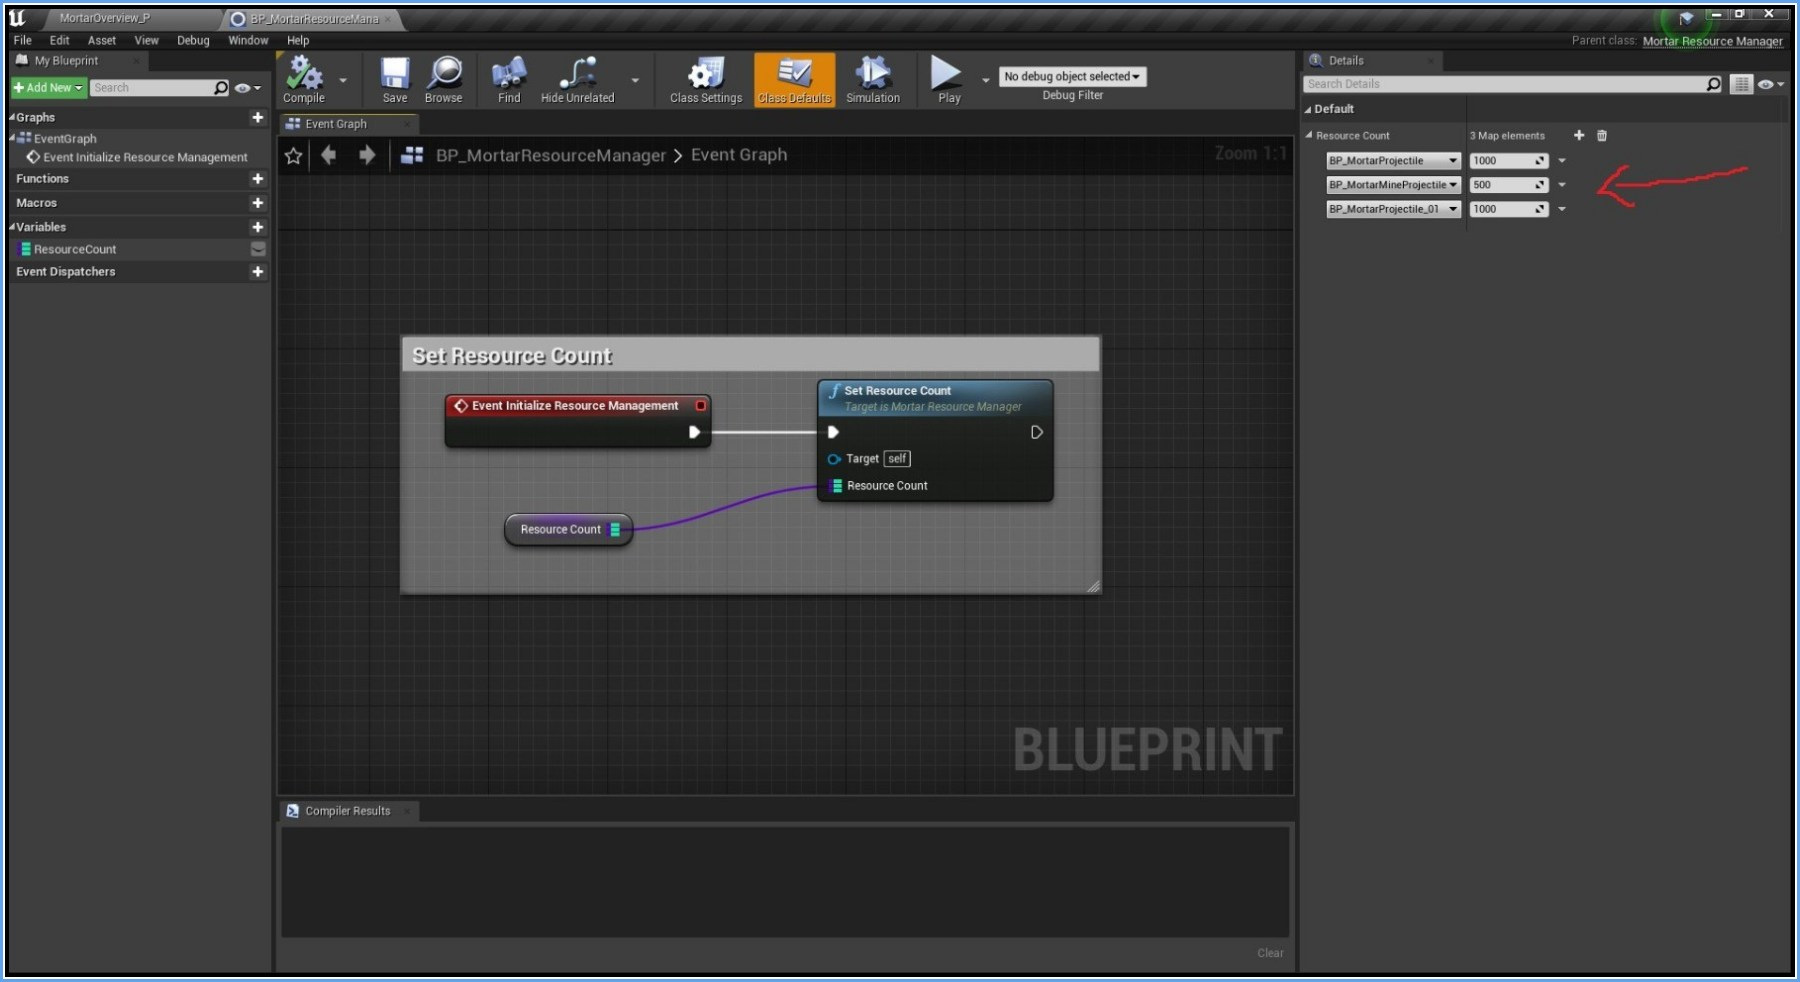
| BP_MortarResourceManager | Blueprint deriving from MortarResourceManager .In this blueprint the number of resources that can be spawned are specified |
Although the plugin is mainly about C++ but for demonstration purposes it also includes few simple static Meshes and materials and effects.
This Plugin is developed in Unreal Engine 4.26. After you have downloaded the plugin from Epic Store you will get a Plugins Folder.
Update - Plugin Now supports Niagara Effects and also ships with some effects.

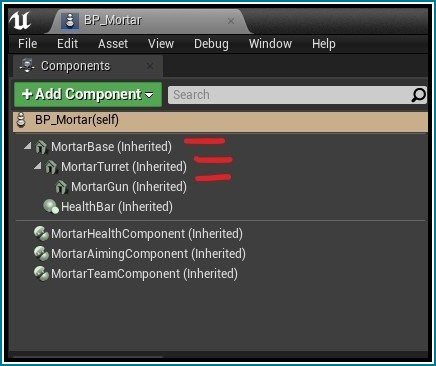
We have 3 levels of the hierarchy of Static Meshes in BP_Mortar
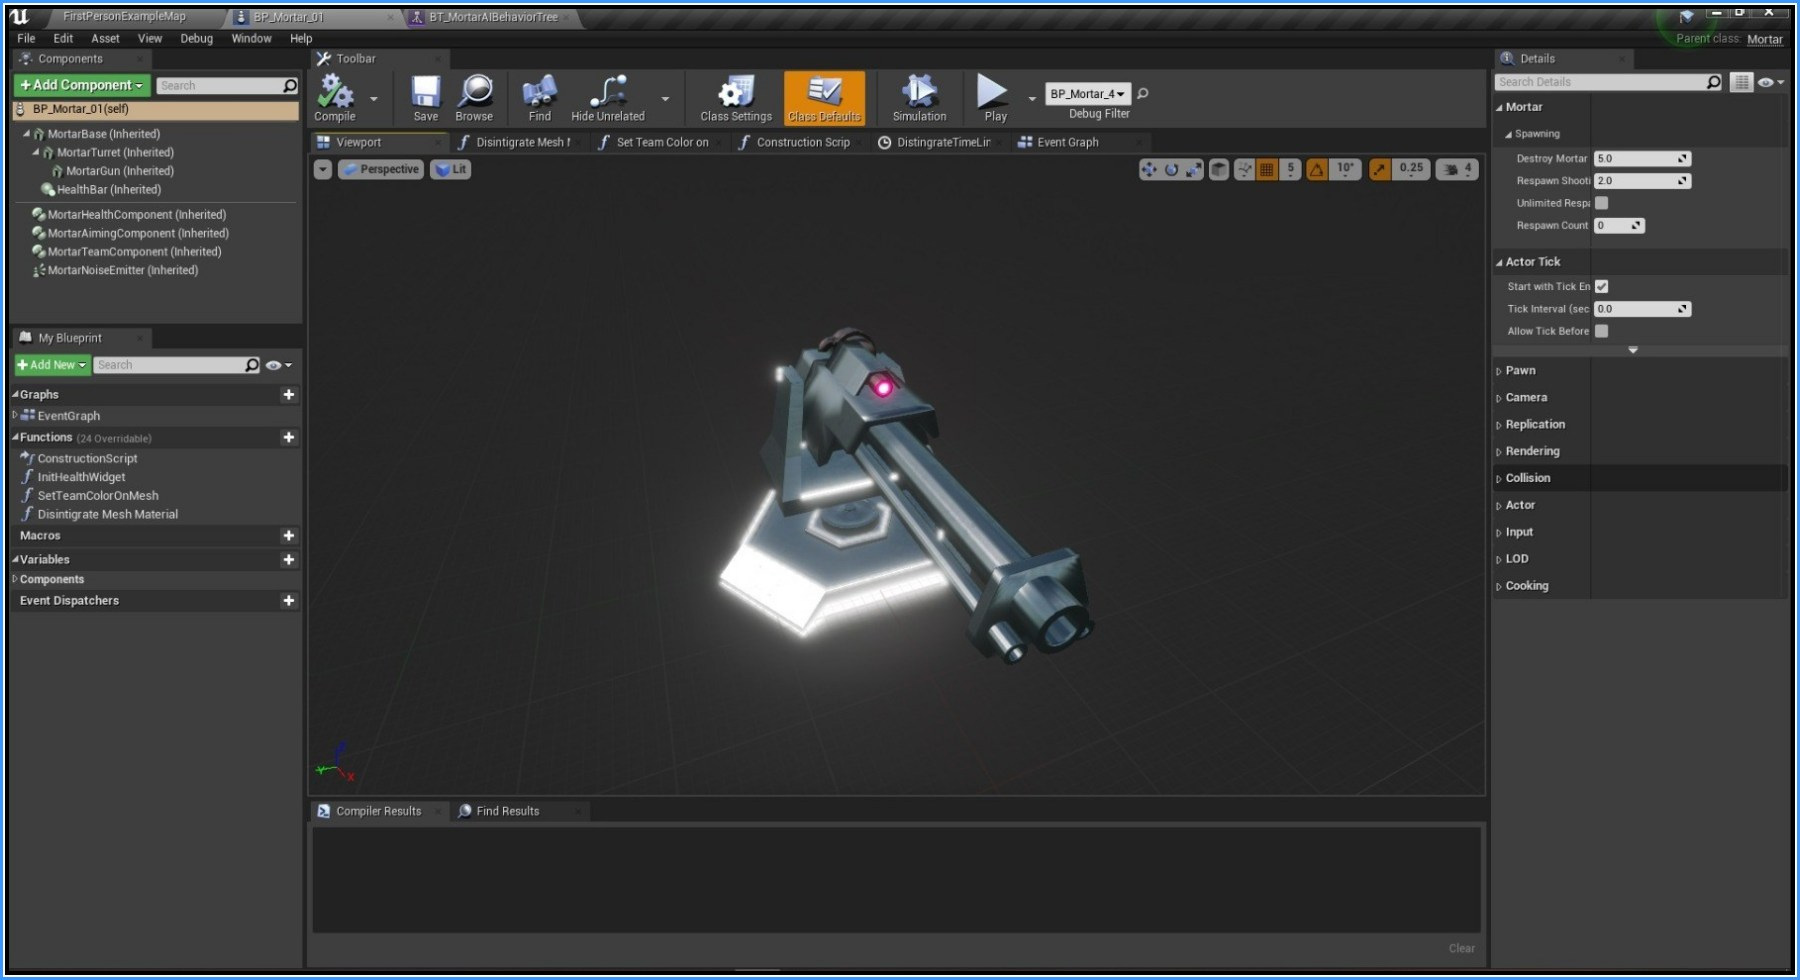
Update - Plugin Now allows spawning More than one Projectile from a mesh.
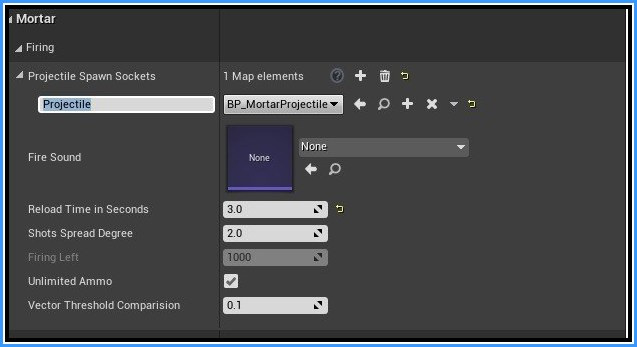
We need to set up a few things before we can use BP_Mortar. As you open the blueprint you can see all the required components have been already added through C++. We need to set up static meshes for Mortar and some other parameters like health bar widget, destroy delay, unlimited spawning There are Few BlueprintImplementableEvent Events exposed to Blueprints from C++.
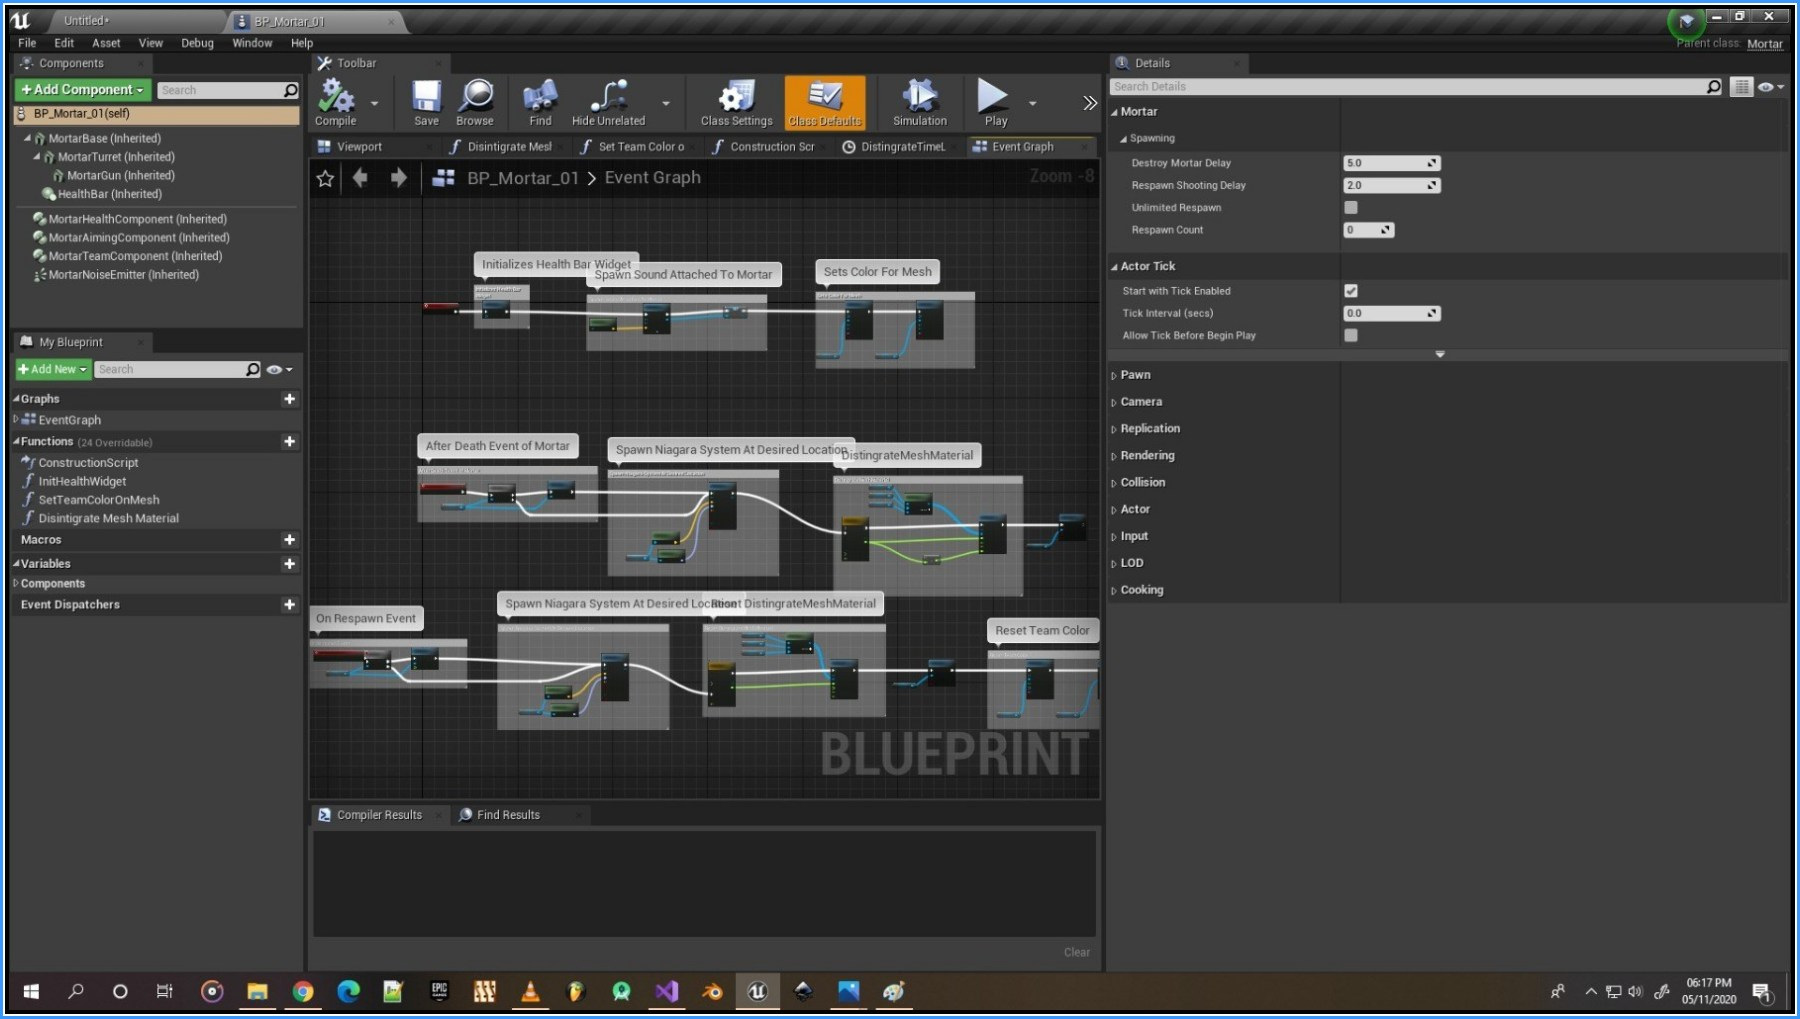
In addition to this there are three Events.
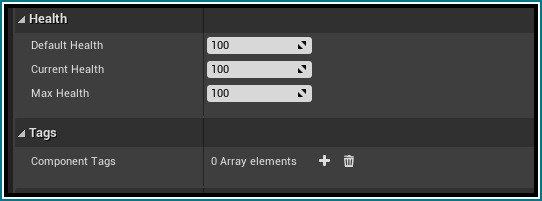
Update in Version 3 Three New Events Have been added for Health Component.
With the help of Team Id attitude of two agents can be decided.
Team ID = 0In addition to this we have one event in Team Component

Most of the Setting is already done through C++ code but few things have to be set up in blueprint.
We need to set up the reference for Blackboard and Behavior Tree that we will use. ![]()
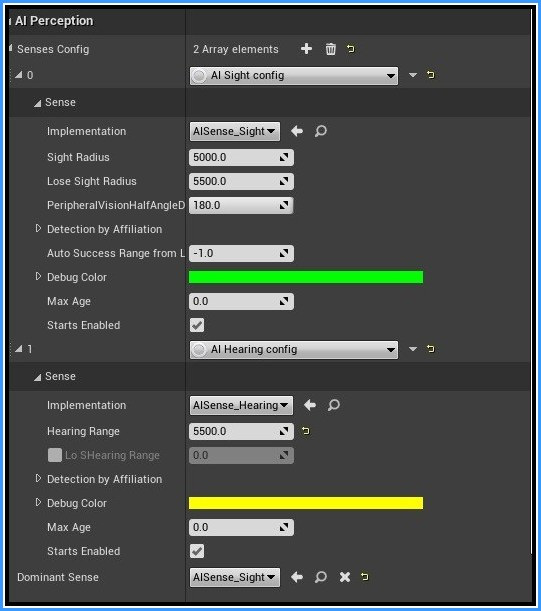
Second We need to add perception through Blueprint and configure the senses. As of now for Unreal Engine 4.25 Adding AI Perception through C++ has an annoying bug where you are not able to add additional senses through the blueprint. Change the setting as you desire, by default following are the values used. Select AI Perception From The Components to see the following properties.
This is the behavior tree for the Mortar which contains task like shooting more tasks can be added here but all tasks should inherit from MortarAIBaseTaskNode to get the best enemy to focus on. There are some settings which can be done for more custom behavior of Mortar AI like
0 team id.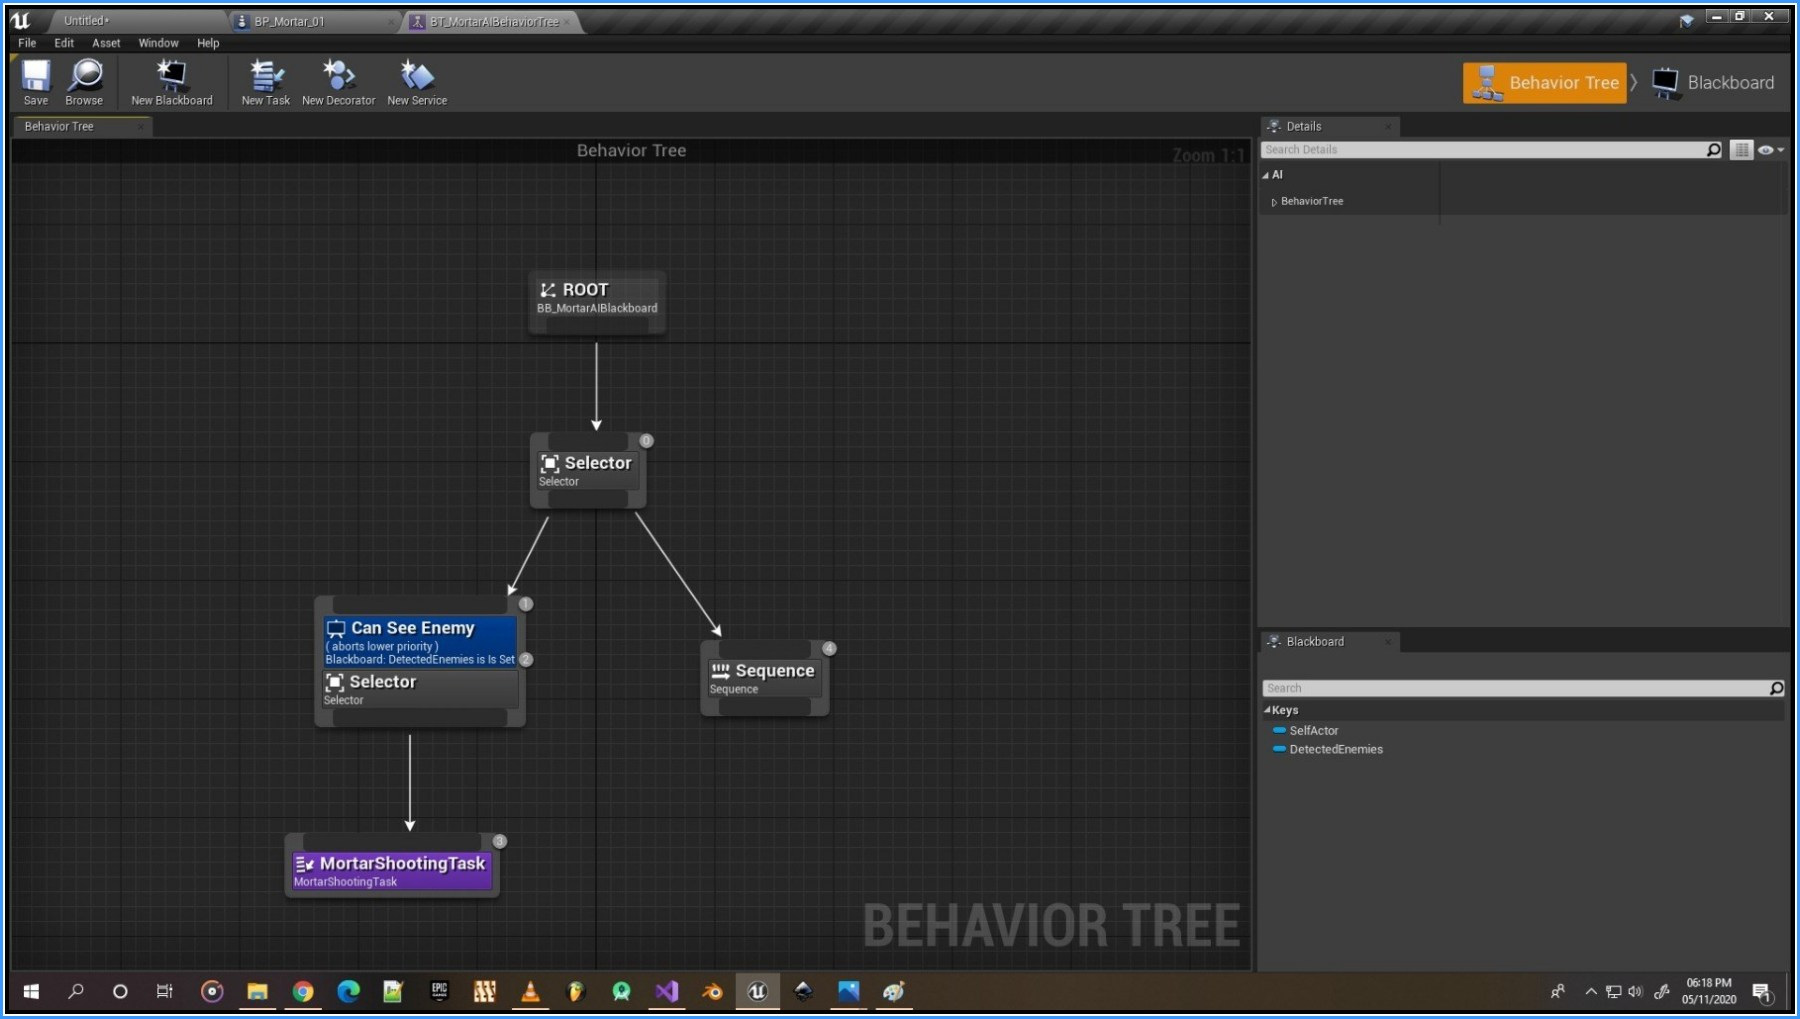
This contains all the keys that will be used by behavior Tree. We require only one Key which is DetectedEnemies. The Type of this key should be ActorsObject which will store the detected actors by AIPerception in memory.

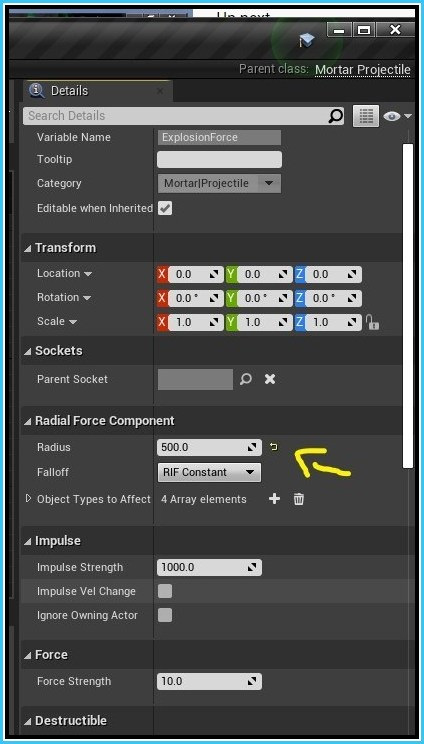
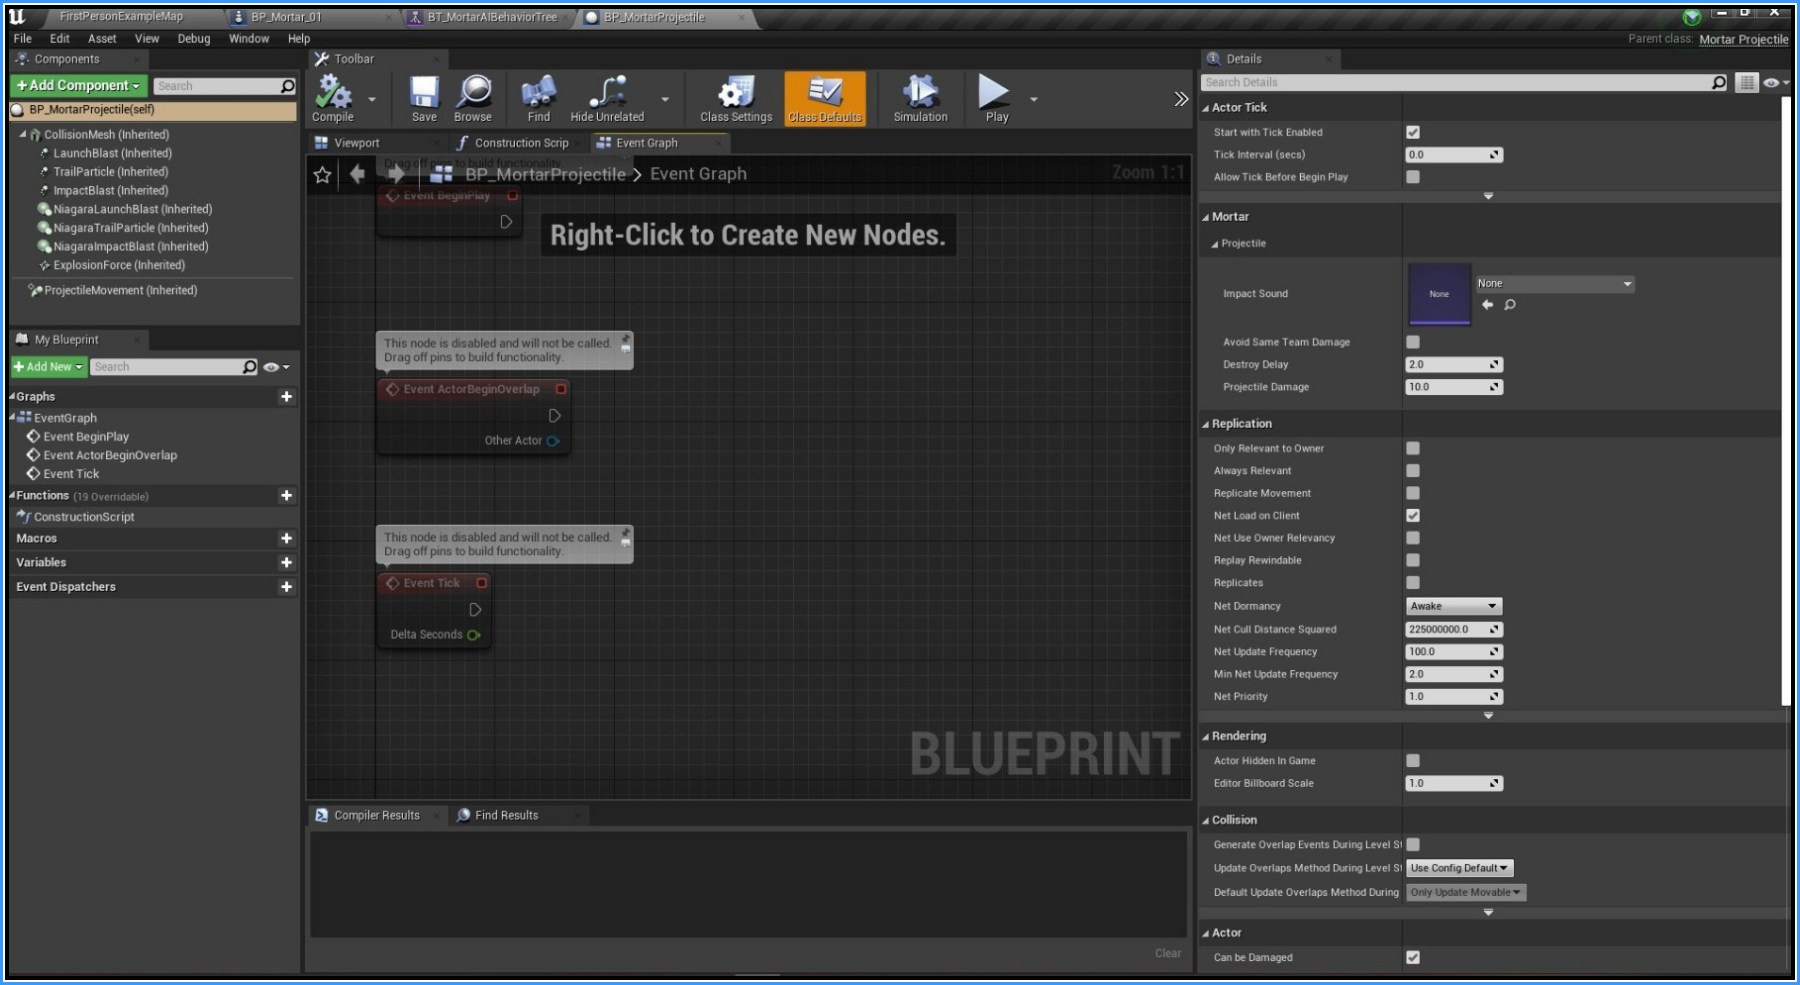
BP_MortarProjectile is an Actor Class that is spawned by AimingComponent Required Components are already set up in C++ with CollisionMesh being the Root Component. You have to assign Static Mesh for Projectile in Collision Mesh properties. By Default it is visible and it generates ComponentHit .Event when it hits a surface.There are five major components excluding Projectile Movement Component and Niagara effects.
This is a UI widget that will be shown for each mortar which will be showing the current health Percentage. There is a basic progress bar already set up in W_MortarHealthBar as shown in the picture with the corresponding function GetPercentage for filling up the health from Mortar.
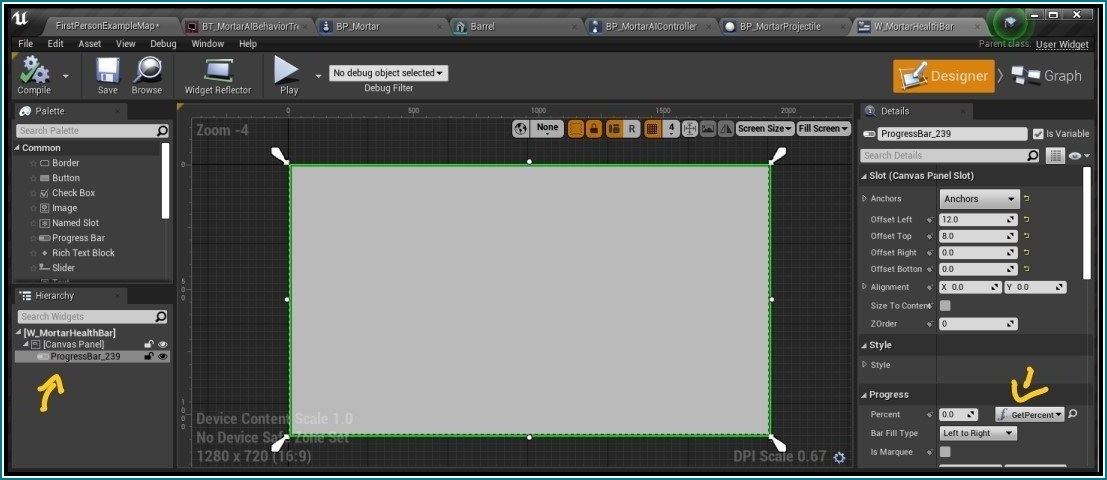
We will setup the GetPercentage Function as shown below. We will make a public variable OwningMortar of Type Mortar which we will use in BP_Mortar to set the reference. 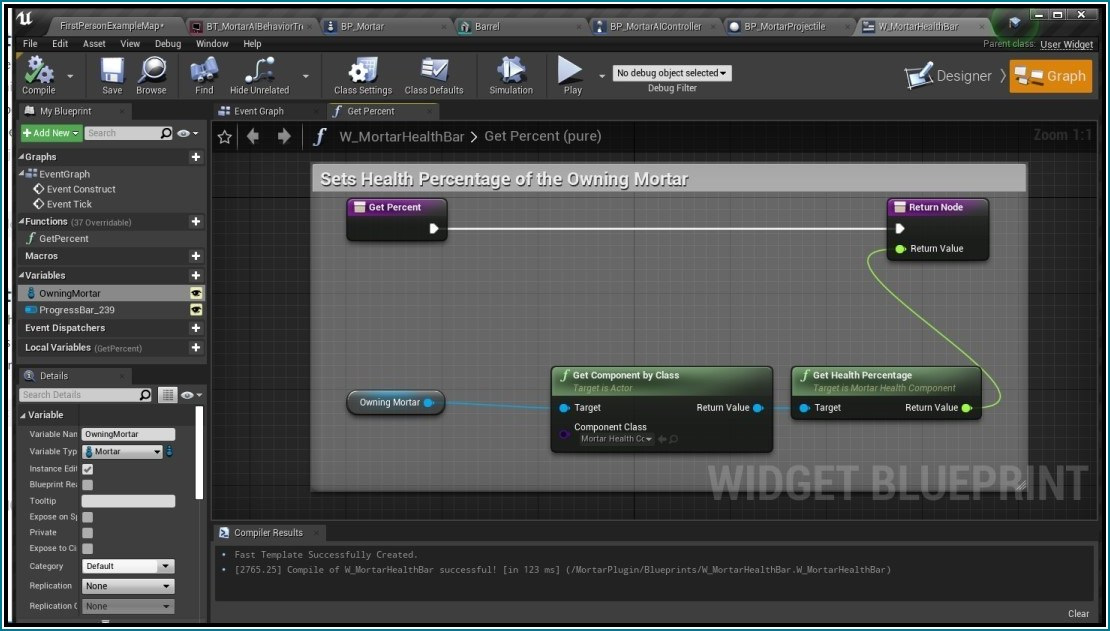
We will create a function InitHealthWidget in BP_Mortar as shown below which will be called on begin play which will set up a reference for the W_MortarHealthBar.
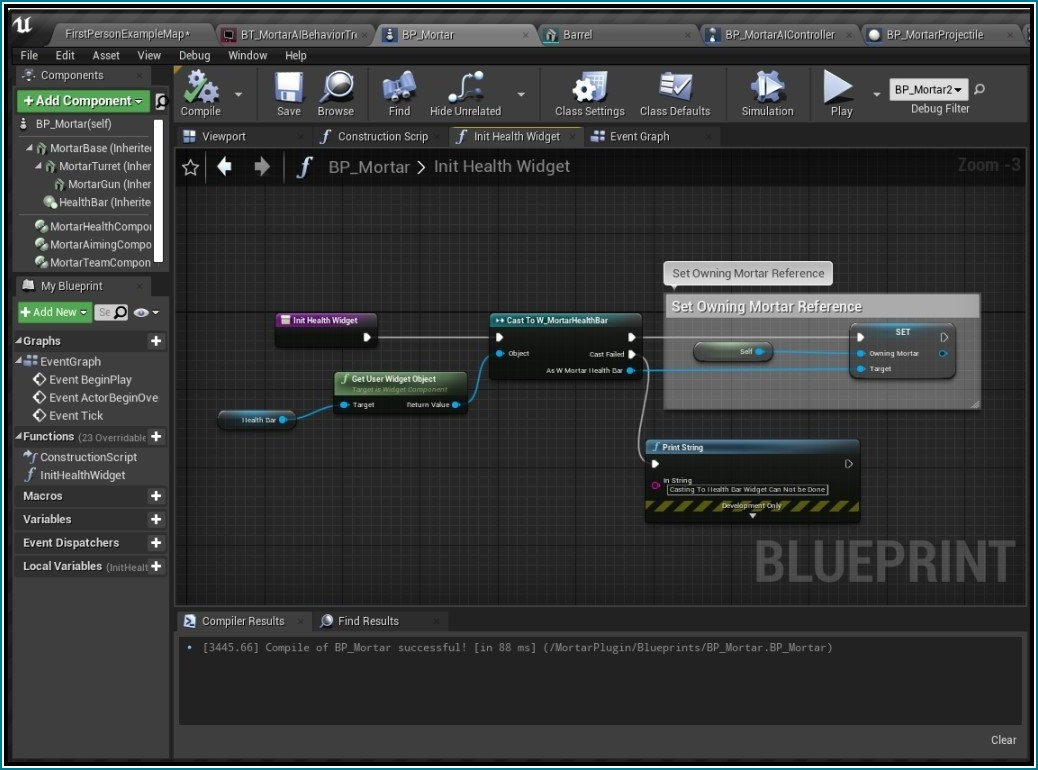
That's it after you have completed all the steps above you would be able to use this in your game.
A new blueprint has been added which is responisble for setting up the maximum projectiles there can be in a level.
